App skeleton building
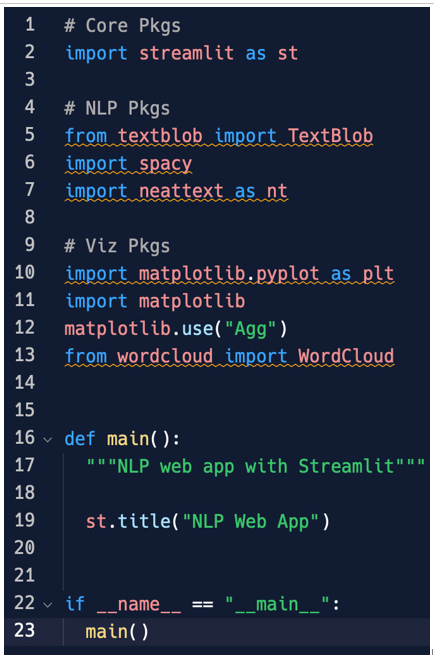
First of all, we need a main function – a function that contains all the business logic of our app and the frontend too. This is the power of Streamlit – building the frontend directly inside Python code. There’s no need for different programming languages, files, and so on; everything is in one place using the same language. Writing this function is very easy – we can add the code shown in Figure 4.9:

Figure 4.9: Importing the necessary libraries and the main function
The first part of the code is quite self-explanatory – we are just importing all the libraries that were introduced a couple of pages before. Just note that when we import matplotlib (the library needed for plotting), we are specifying that we wish to use the Agg engine (without this instruction, matplotlib would use its default engine). With Streamlit’s initial versions, this Agg engine used to work better, but with the very recent versions, matplotlib’s standard engine performs well too. So, the suggestion is to try with and without this instruction and to use it only in the case of a real improvement.
So, thanks to def, we can create a function named main. At the moment, this function just prints a title on the screen (st.title): NLP Web App.
That’s it – we are ready to launch the web application we’ve made with Streamlit. In our browser, we’ll see our beautiful title: NLP Web App.
To run the app in our terminal, we should write streamlit run app.py. However, since we are inside a pipenv environment, we have to type the following:
pipenv run streamlit run app.py
This instruction starts a web server that runs our Streamlit app on port 8501. Our Streamlit app is the code contained in the app.py file.
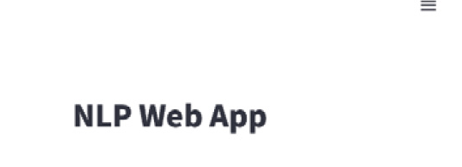
Immediately, the browser will open up on localhost port 8501 and we will see the web app, as shown in Figure 4.10:

Figure 4.10: Web app running on localhost:8501
At the moment, the web application is doing nothing but showing the NLP Web App title, together with the hamburger menu at the top right. Please explore all the options contained in this menu.
What is important to understand now is that usually, all applications perform a set of tasks, let’s say three or four or N (any number), and for this reason, all applications have the same skeleton, a common structure or backbone that enables each task. These tasks can be included in an application menu and built up by a selectbox, allowing the user to choose what to do. We can put this selectbox on the left-hand side of our app. So, assuming that the tasks of NLP Web App will be Text Analysis, Translation, Sentiment Analysis, and About, we can create a list of them and a selectbox that works on this list by adding the following code in the main function just after the st.title line:
activity = [“Text Analysis”, “Translation”, “Sentiment Analysis”, “About”]
choice = st.sidebar.selectbox(“Menu”, activity)
