Adding the Text Analysis part
In this part, we will use textblob, a Python library for processing textual data. It provides a simple API for diving into common NLP tasks such as part-of-speech tagging, sentiment analysis, classification, and more. For more details, visit pypi.org (the famous Python Package Index).
As usual, we need to install the package in our virtual environment by just typing the following command:
pipenv install textblob
And then, we import it into our Python script, adding the following line at the very beginning in the importing libraries part:
from textblob import TextBlob
Anyway, if you followed Chapter 4 carefully, you have already done this, but it’s better to repeat it just in case.
Let’s jump to the Text Analysis part of our script and finally add its specific business logic. Text Analysis, as we will see during the coding, is a function focused on text stats (length, number of words, etc.), wordstopping, lemmas and tokens, and so on. We will quickly explain these concepts one by one in the next pages. Besides NLP concepts, what is very important here is to understand how to use the various Streamlit widgets, functions, and technicalities in order to create and build up solid and well-performing web applications.
Adding a text area
Currently, in this part, we just have a header and a subheader. In order to perform text analysis, for sure we need some text, so as the very first operation, let’s add a text area where we can input all the text we want:
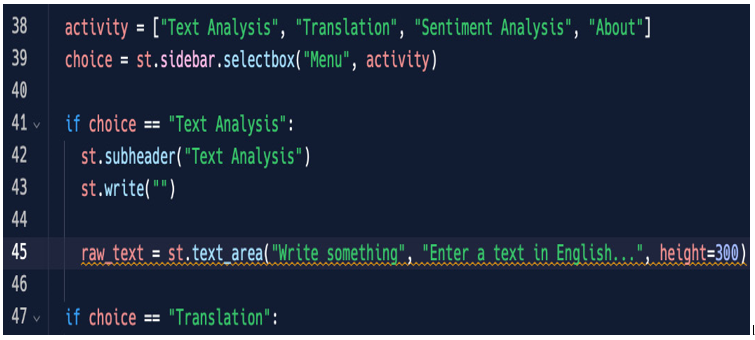
Figure 5.4: st.text_area
We are using text_area to get some text and put it in a variable named raw_text. Try to play with st.text_area arguments a little, and especially try to discover what happens if you don’t use height.
Adding the Analyze button
We want to do something with the text typed in this text_area so, just to understand better how it works, let’s add a button named Analyze that, when pushed, writes our text on the screen. The code is quite simple, as shown in the following figure:
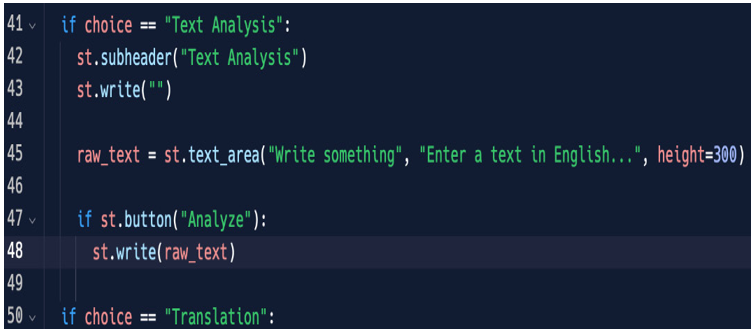
Figure 5.5: A button to show our text
To keep it very neat and clean, we write something in the text area – for example, Hello everybody! – click on the button, and see what we wrote on the screen. This is the result:
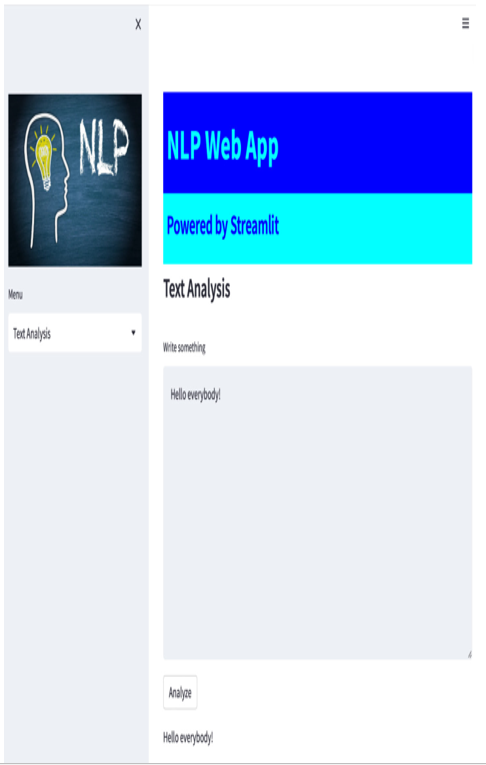
Figure 5.6: Hello everybody!
To perform any NLP task, TextBlob needs to convert any text into a Blob object, something specific to this nice package. Let us see how.
Creating the Blob object
To perform all our NLP tasks with TextBlob, we have to be sure that this Blob can be created, and it can be created only if the text area contains some text – in other words, if the text area is not empty.
Let’s modify the preceding code a bit, just to be sure that the text area is not empty and that the Blob object will be created without issues:
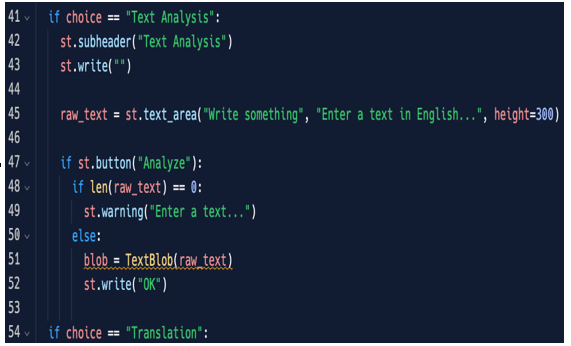
Figure 5.7: TextBlob in action
So, if there is no text in the text_area, its length (len) is equal to zero and we display a warning message; otherwise (else) we create a TextBlob object, save it as a variable named blob, and display a confirmation message (OK).
And now, we have our TextBlob object working.
Adding basic functions
Up to now, we have edited all code properly and we are ready to implement some real text analysis functions. In fact, we will be using TextBlob later on for the sentiment analysis function. Now, we just use it to check that the application runs correctly, so if you want, you can comment on the following line of code, like this:
#blob = TextBlob(raw_text)
Let’s get started with Basic Functions, so replace the st.write(“OK”) line with the following:
st.info(“Basic Function”)
So far, we are at the stage shown in the following screenshot:
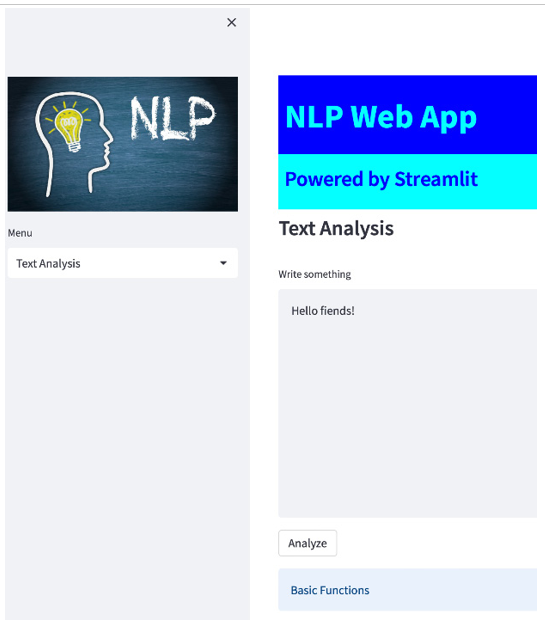
Figure 5.8: Basic functions
It’s time to understand how to show and hide information on the screen using columns, expanders, and more advanced coding.
